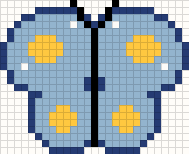
 Small and easy patterns
The short version
- Gather and prepareGet 14-count aida, a size 24 blunt needle, floss and a hoop. Fold the fabric in quarters to find and mark the center.
- Stitch from the centerFind the middle of the chart, start without a knot, and make crosses with all top legs slanting the same way.
- Finish neatlyWeave ends under stitches on the back, add backstitch outlines last, then wash gently if needed and frame or mount.
What you need
Fabric: aida cloth is woven in a clear grid of squares with holes at each corner, which makes counting simple. 14-count, meaning 14 squares per inch, is the usual starting point. Thread: six-strand cotton embroidery floss, which you separate into two strands for 14-count. Needle: a blunt-tipped cross stitch needle, size 24 for 14-count, slides between threads instead of piercing them.
A hoop or a plastic snap frame keeps the fabric taut so stitches stay even. Small sharp scissors, a chart and good light finish the list. Some stitchers like a magnetic needle minder, a highlighter for marking progress on a printed chart, and floss bobbins to keep colors organized, but none of those are essential.
Kits are a sensible first purchase because they include fabric, the exact floss, a needle and a chart in one box. The downside is that kit designs are fixed. Once you have finished one, buying fabric and floss separately and working from your own chart costs little more and lets you stitch anything.
Preparing fabric and thread
Cut fabric with at least 2 to 3 inches of spare on every side of the design. To stop the edges fraying, run masking tape along them, whip-stitch them, or zigzag them on a sewing machine. Fold the fabric in half each way and pinch the folds; where they cross is the center. A few running stitches along those fold lines in a contrasting thread, removed later, make it easy to keep your bearings.
Pull about 18 inches of floss from the skein and cut it. Hold one end and pull out single strands one at a time, then put back together as many as you need. Separating strands this way, rather than splitting the bundle in two, makes them lie flatter and cover better.
Starting without a knot
Knots make lumps under framed work and can pull through aida. Two knotless starts cover most situations. For the loop start, take one strand twice as long as usual and fold it so both ends are in the needle eye. Come up from the back, go down to make the first half stitch, and pass the needle through the loop waiting on the back. It locks instantly. This works whenever you stitch with an even number of strands.
For the tail method, leave an inch of thread on the back and hold it flat, then cover it with your first several stitches. With an odd number of strands, or when starting a new color among existing stitches, you can also weave the new thread under a few stitches already on the back. New to needlework in general? Cross stitch, embroidery and needlepoint compared explains which to try first. For a first project, pick one of the easy cross stitch patterns or a cross stitch bookmark.
Making the stitch
A cross has two legs. Come up at the bottom left corner of a square and go down at the top right: that is the first leg, a diagonal slanting one way. Come up at the bottom right and go down at the top left to complete the X. The one rule that makes work look professional is consistency: every top leg must slant in the same direction across the whole piece.
There are two common ways to work a row. The English method finishes each cross before moving on, useful for scattered stitches and on evenweave. The Danish method stitches a row of first legs in one direction, then comes back completing them, which is faster for blocks of one color and gives a tidy back with vertical stitches. Use whichever suits each area.
Keep tension relaxed: the thread should lie flat on the fabric without pulling holes larger. If the floss twists as you stitch, let the needle dangle every so often to unwind it.
Speed comes with rhythm, not haste. Stitchers who sew with the fabric in a hoop often use a stab method, pushing the needle straight down and pulling it through from below, which gives very even tension. Others use a sewing method, scooping the needle in and out of the fabric in one motion, which is quicker on slack fabric in hand. Both are correct; try each for a row.
Reading the chart while you work
Each square on the chart equals one cross on the fabric, and each symbol stands for a floss color listed in the key. Find the chart center, usually marked by arrows on the edges, and match it to the center of your fabric. Count squares from there, using the bold lines every 10 squares as checkpoints.
Work one color across an area at a time, and when you need to jump, avoid carrying thread more than about three or four squares across the back, especially with dark colors that would show through light fabric. For a full explanation of symbols, fractional stitches and keys, see how to read a cross stitch pattern.
Plan the order of colors in each area. Starting with the darkest or most-used color gives you landmarks to count from, and filling a light background last prevents dark fibers from being dragged into it. Keep a separate needle threaded for each active color if you switch often.
Backstitch, letters and finishing
Outlines and lettering are often done in backstitch after all the crosses are complete. Come up one hole ahead, go back down into the end of the previous stitch, and move forward again, building a continuous line. One strand is common for fine outlines. Letters can be made in full crosses too; the cross stitch name and text tool lays words out on a grid for you.
To end a thread, run the needle under four or five stitches on the back and trim close. When the piece is finished, a gentle wash in cool water with a mild soap removes hoop marks and finger oils; roll it in a towel, then press it face down on a fluffy towel with a warm iron so stitches are not flattened. Check the care advice for your threads and fabric first.
Frame finished work by lacing or taping it over acid-free board, or simply leave it in a wooden hoop, trimming and gluing the back. Smaller pieces make good cards, ornaments and bookmarks.
Stitching on clothes and other fabrics
To cross stitch on a T-shirt, tote bag or denim, which have no visible grid, use waste canvas: a loosely woven grid basted onto the garment. Stitch through both layers, then dampen the canvas and pull its threads out one by one, leaving the design behind. Choose a stable area, use a hoop, and put a lightweight interfacing behind stretchy fabrics. A small design, such as an initial or a flower around 30 stitches wide, is a good first try.
For your first piece, choose something small and cheerful from the small and easy patterns, or turn a photo into your own design with the cross stitch pattern maker.
Questions
Is cross stitch easy for beginners?
Yes, it is one of the easiest needlecrafts to learn. There is essentially one stitch, the fabric has a built-in grid, and mistakes can be unpicked. The main skill is counting accurately, which gets easier with bold 10-square lines on the chart and a little practice.
What size needle and how many strands for a beginner?
On 14-count aida, use a size 24 blunt needle and two strands of floss. That combination covers the fabric nicely and is the setup most beginner kits use. On 11-count, go up to three strands and a size 22 needle. Check the pattern key in case the designer asks for something different.
Do I have to start in the middle?
It is the safest habit because it guarantees the design ends up centered with even margins. Experienced stitchers sometimes start at a corner, but that requires careful counting to be sure the whole design fits. If you do start elsewhere, count to the corner twice and baste a guide line before committing.
Should the back of my cross stitch be neat?
Tidy enough to lie flat, without knots or long jumps that show through. It does not need to be perfect. A neater back mostly comes from stitching rows in one color and starting with loop or tail methods. Judges at county fairs may look at the back, but for pieces hanging on your own wall, only the front counts.
Can I cross stitch without a hoop?
Many people do, particularly on stiff aida with small designs. A hoop or frame helps keep tension even and stops puckering, so beginners usually find it easier to use one. Remove the hoop between sessions to avoid marks. Snap frames and scroll frames are alternatives for larger pieces.
How do I stop the floss from tangling and knotting?
Use shorter lengths, around 18 inches, separate strands one at a time, and let the needle hang free now and then so the twist relaxes. Waxy hands, very long threads and pulling too hard all make tangles worse. A drop of thread conditioner helps some people with metallic and dark threads.
How long does a cross stitch project take?
It depends on size and pace. Many stitchers manage roughly 40 to 80 stitches an hour once comfortable. A small 40 by 40 motif, about 1,000 stitches once the background is left empty, is a few evenings; a fully stitched 100 by 100 design is well over a hundred hours, which is why big pieces often take months.