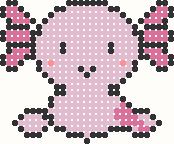
 Free perler bead patterns
The short version
- Simplify the pictureChoose or draw an image with bold shapes, then decide how many beads wide it should be and which bead brand you own.
- Make the chartConvert or draw it on a grid, limit the colors, fix eyes and outlines, and count the beads you need of each color.
- Build and fuseLay the chart under a clear pegboard or count across rows, fill the board color by color, then iron as your bead maker directs.
What makes a picture work in beads
Fuse beads are big, chunky pixels. A standard bead is about 5 mm wide, so a 29-bead square is roughly the size of a coaster. At that scale only strong shapes survive: silhouettes, outlines, blocks of flat color. That is why classic pixel-art icons, emoji-style faces and simple animals look so good in beads, and why a detailed landscape photo usually does not.
When choosing your own image, squint at it. If you can still recognize the subject when it is blurry, it will probably work. Crop close, remove clutter, and favor pictures where the subject is clearly lighter or darker than its surroundings. A child's drawing with thick marker lines is often a better starting point than a photograph.
Resolution sets expectations. A fuse-bead portrait 29 beads wide has roughly the same detail as a tiny app icon, while four boards across, 116 beads, starts to resemble a low-resolution photograph. Decide which of those you want before choosing the source image, and pick a simpler picture for smaller pieces.
Making a pattern from a picture
Converting by software does the tedious part. In the perler bead pattern maker you add the image, set the width in beads, with quick buttons for one to four boards wide, choose the bead brand and size, and limit the number of colors. The picture is resized to that grid and each cell is matched to the nearest color the brand actually sells. A count for every color is listed with a small spare allowance.
Two settings make the biggest difference. Width decides how much detail fits: a face 29 beads wide shows eyes and a mouth, while 58 beads gives room for whiskers and shading. Color count decides how blotchy the result looks: eight to twelve colors keep most designs crisp. Small, distinct features such as eyes and outlines are kept in their own color rather than being absorbed by the surrounding area.
After conversion, look closely at the result before printing anything. Check that the eyes have a light catchlight, that dark outlines are continuous, and that no lone bead of an odd color sits in the middle of a flat area. Repaint those with the pencil. Five minutes of tidying makes a bigger difference than any setting.
Designing one by hand
For pixel art, logos of your own club or simple shapes, drawing directly on a grid is often quicker than converting. Start with the outline in a dark color, one bead thick. Fill large areas next, then add a single-bead highlight to round shapes, like a white dot in an eye or a lighter bead on a cheek. Keep diagonal lines in clean steps of one or two beads so edges look intentional rather than ragged.
Symmetry helps beginners. Draw half of a heart, butterfly or face and mirror it. The maker's editor has pencil, fill and replace color tools, and every change can be undone.
Color choice deserves a moment of planning too. Pick a dark outline color, one or two fills per area and a highlight, and resist adding shades that differ only slightly; at bead scale, near-identical colors read as noise rather than shading.
How many pegboards does a design need?
Big designs are split across several square boards, each 29 by 29 pegs. Plan the width and height in multiples of 29 when you can, because a design 30 beads wide needs a second board for just one column. The maker divides the design into numbered board sections, so you always know which part goes where.
Boards are joined either by clipping connectable boards together, or by building each section separately, fusing it lightly, and then joining sections with a final pass of the iron along the seam. The first method gives a cleaner join; the second needs fewer boards.
For a mixed approach, build the main design across full boards and add small extra pieces, such as a tail or an ear that sticks out, on a separate board fused on afterward. That keeps the board count down while letting the outline break out of a strict rectangle.
| Beads wide | Boards across | Approximate width with 5 mm beads | Approximate width with 2.6 mm minis |
|---|---|---|---|
| 29 | 1 | 14.5 cm / 5.7 in | 7.5 cm / 3.0 in |
| 58 | 2 | 29 cm / 11.4 in | 15.1 cm / 5.9 in |
| 87 | 3 | 43.5 cm / 17.1 in | 22.6 cm / 8.9 in |
| 116 | 4 | 58 cm / 22.8 in | 30.2 cm / 11.9 in |
How to use a perler bead pattern
The easiest method uses a clear pegboard over a printed template. Print each board page at 100 percent so one printed square equals one peg, and check the scale with a ruler before starting. Lay the board on top, line up the corners, and drop beads onto the matching colored squares. No counting needed.
Without a clear board, read the chart row by row. Work from the top left, counting beads in each row, and mark off rows with a pencil as you finish. Many people prefer placing one color at a time: all the black outline first, then each fill color. Outlines anchor everything else and make miscounts obvious early.
Tweezers or a bead pen help with small details and mini beads. Keep beads sorted by color in a divided tray, and keep the board on a tray or baking sheet so you can move it without spilling.
If a bead is placed wrongly, lift it with tweezers rather than tipping the board, which tends to scatter neighbors. Once a board is complete, compare it against the chart one last time, row by row, before heating: corrections after fusing mean cutting or prying beads out, which rarely looks clean.
Fusing the finished design
Most fuse beads are joined with a household iron through ironing paper, applied with gentle, even movement until the bead tops melt together. Heat, time and the right paper vary by brand, so follow the instructions supplied with your beads and test on a small piece first. Cooling the piece under a flat, heavy book keeps it from curling.
An adult should handle the iron when children are making the project, and work in a ventilated room. Questions such as whether beads can go in an oven are best answered by the manufacturer of your specific beads, not by general advice.
Pieces that will be handled often, such as keychains or coasters, benefit from being fused on both sides. Wall pieces that need to look like a flat mosaic can be fused lightly so the round bead shapes remain visible. Experiment on offcuts to see which finish you like.
Where to go next
Start with a single-board design to learn the rhythm, then try two by two. If you want something ready to build, the free perler bead patterns open in the maker so you can change colors or size. To check which colors your brand offers, browse the perler bead color chart, and if you own several brands, read how Perler, Hama and Artkal differ.
Keep a notebook or a folder of your own designs as you go. Small variations, like the same animal in three color schemes, are easy to make once the first pattern exists, and you will quickly build a personal library of tested designs that you know fit a board and iron well.
Questions
How do I turn a picture into a perler bead pattern?
Crop the picture to the subject, then use a pattern maker to resize it to a bead grid and match each square to a real bead color. Set the width in beads, choose your brand, and limit colors to around eight to twelve. Then tidy the eyes and outlines by hand and print the chart.
How do you use perler bead patterns?
Either print the pattern at true size and slide it under a clear pegboard, placing beads on the matching squares, or read the chart row by row and count. Placing one color at a time, starting with the outline, keeps mistakes small and easy to spot before you iron.
Can I make my own perler bead patterns for free?
Yes. Graph paper and colored pencils cost almost nothing, and StitchJam's bead pattern maker is free in the browser, including board-by-board printable pages and bead counts, with no account. Saved designs stay in your browser so you can come back to adjust them later.
How big should a perler bead pattern be?
For a first project, keep it within one 29 by 29 board, about 14.5 cm across with standard beads. Faces and animals read well from about 25 to 40 beads wide. Larger pictures need 58 or 87 beads wide and several boards, plus more patience at ironing time.
What are the easiest perler designs for beginners?
Shapes with a clear outline and few colors: a heart, a strawberry, a mushroom, a star or a simple animal face. They fit on one board, need five to eight colors, and are forgiving if a bead is out of place.
How many beads does a design use?
Count the filled squares. A completely filled 29 by 29 board takes 841 beads. Leaving the background empty often halves that. Pattern makers list a count per color; buy a little extra, as beads roll away. Bags commonly come in fixed quantities, so round each color up to whole bags.
Can I make a 3D perler bead design?
Yes. Three-dimensional pieces are made from several flat panels fused separately and then joined, often by slotting panels together or by fusing small edge sections. Plan each panel as its own flat pattern, keep the joints simple, and build a small test box or cube before attempting a complex figure.